
Looking for a toddler-friendly sensory activity? This easy recipe for taste-safe play sand is perfect for little hands (and mouths!) and made with just two pantry ingredients.
Because our little ones explore with their hands… and their mouths.
I’m always looking for simple and safe ways to keep Callie entertained at home, especially activities that don’t involve screens and give us a chance to be hands-on together. This DIY taste-safe play sand checks all the boxes: easy, inexpensive, toddler-approved, and yes… even if they sneak a little in their mouth, it’s totally safe.
If your toddler is in that “everything goes in the mouth” phase (mine is!), this is such a great alternative to traditional sensory bins.
Why You’ll Love This Sensory Activity:
- It’s completely taste-safe and non-toxic
- It’s super easy to make with pantry staples
- It keeps little hands busy
- Made with just 2 ingredients
- Super soft and moldable
- Great for sensory development
- Easy to store
- Cleanup is surprisingly manageable
- It’s perfect for babies and toddlers who are curious and love to explore textures but aren’t quite ready for smaller sensory items like beads or rice.
Taste-Safe Play Sand is made with:
- 5 lbs whole wheat flour (1 bag): Using whole wheat gives the sand a nice, natural beige color and a bit of extra texture
- 2 cups vegetable oil: makes it like damp sand that is easy to clump and crumble
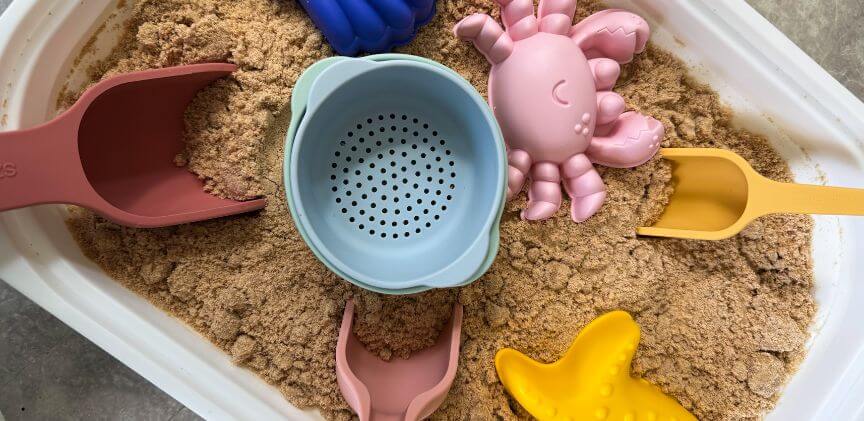
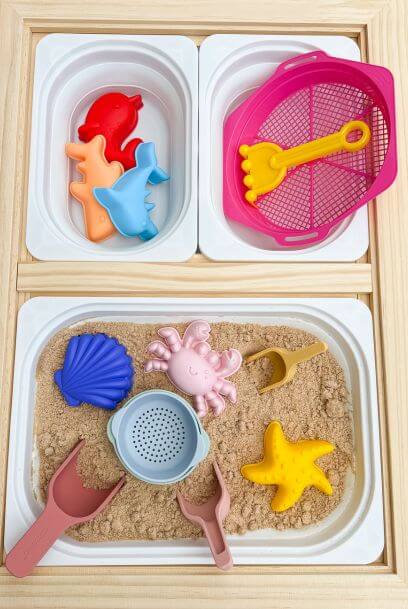
- A sensory table or large plastic bin: A large bin, sensory table, or plastic box to explore and play in
- Scoops, cups, or toys: I always find good ones to use at the Dollar Tree or Dollar Spot at Target, but anything can work- be creative!
Click here for the links to everything I used.
How to Make Taste-Safe Play Sand:
- Pour the flour into your bin or a large mixing bowl.
- Add the oil slowly, mixing with a large spoon or your hands until it feels like damp sand. (It should clump when squeezed but crumble easily.)
- Add a few drops of food coloring if you want a fun pop of color. (Totally optional—but fun!)
- That’s it! You’ve got your own baby and toddler-safe sensory sand.
Play Ideas for Toddlers:
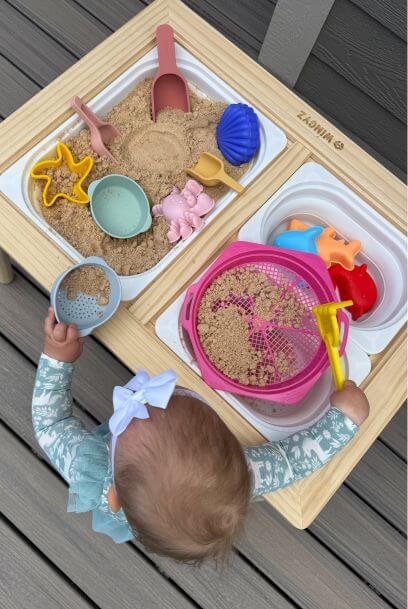
Once the sand is ready, let your toddler explore. Here are a few fun ideas to mix it up:
- Make a beach scene with seashells or items to build sandcastles
- Bury small toys or animals and let them dig for “treasures”
- Add measuring cups, muffin tins, or spoons for pretend baking
- Use mini dump trucks or construction toys for vehicle play
- Add seasonal elements (fall leaves, plastic Easter eggs, tiny holiday trinkets)
Cleanup + Storage Tips:
- Store in an airtight container or zip bag, it will last up to a month, depending on how often you use it (or I have successfully frozen it and kept it for longer)
- Play outside if possible for the easiest clean up
- Lay a towel or mat under the play area if you’re inside
- If your baby or toddler tries to eat it, gently redirect—”not a snack, just for play.”
Why I Keep Coming Back to Sensory Play:
Honestly, these simple activities help me slow down and connect with my toddler. There’s no pressure to “do it right”—we just explore together, name what we see, and stay present. It can be messy sometimes, but always worth it.
So if you’ve got a toddler and a few minutes to mix this up, give it a try. You might just get 20 minutes of quiet play and a full heart watching them explore.
Tag me over on Instagram @lauralivewell if you try it—I’d love to see your little one digging in.
Taste-Safe Play Sand for Toddlers (Easy DIY Sensory Bin Idea)
Ingredients
- 5lb bag of whole wheat flour
- 2 cups vegetable oil
Instructions
- Pour the flour into your bin or a large mixing bowl.
- Pour in your oil
- Mix well with a large spoon or your hands until it feels like damp sand. (It should clump when squeezed but crumble easily.)