

These easy salt dough ornaments are the perfect DIY keepsake craft for toddlers, kids, and families to make lasting holiday memories.
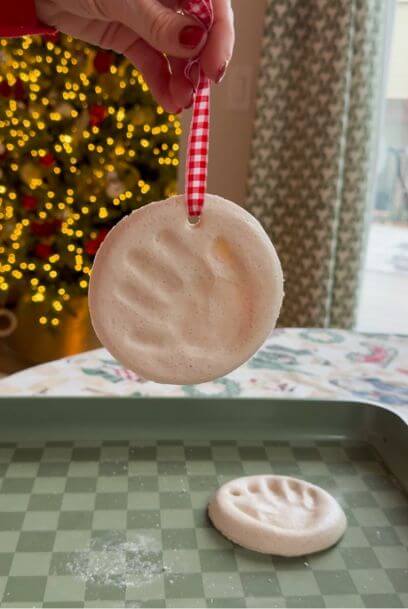
There’s something so special about creating ornaments that hold memories—tiny handprints, little footprints, or even just a shape that makes you smile. This year, I wanted to make something personal and timeless, so I turned to a classic: salt dough ornaments. They’re easy, fun, and a craft you can enjoy with your little ones.

You will love salt dough ornaments because:
These ornaments are more than just decorations—they’re little memories you can hold onto. I love looking back and seeing exactly how tiny those hands or feet were that year.
- Simple Ingredients: Uses basic pantry staples (no emergency trips to the store needed!).
- Non-Toxic Fun: Safe for toddlers and kids to explore.
- Timeless Keepsake: They last for years and years, becoming a treasured family heirloom.
- Perfect Gift: A heartfelt, customized present that loved ones will adore.
They’re simple, meaningful, and make a perfect gift for grandparents or friends, too. Whether you keep them for yourself or give them as gifts, salt dough ornaments are a holiday craft you’ll treasure for years.
Salt dough ornaments are made with:
- Flour
- Salt
- Cream of tartar
- Water
- Mod Podge or paint for finishing
- Ribbon for hanging
How to make salt dough ornaments:
Mix Your Dough
Start by combining 2 cups flour, 1 cup salt, and 2 tablespoons cream of tartar in a bowl. Add 1 tablespoon oil and slowly mix in 1½ cups water until the dough becomes soft and pliable. Adding the water gradually is key—you want it soft enough to roll but not sticky.
Roll It Out & Personalize
Roll your dough on a lightly floured surface. Now comes the fun part—press in tiny handprints or footprints. Use cookie cutters, cups, or even a vase to create festive shapes. This is a great way to make each ornament unique and memorable.
Make a Hole for Hanging
Before baking, use a straw or skewer to make a hole for your ribbon. This simple step makes it easy to hang your ornaments later without cracking or breaking them.
Bake Low & Slow
Place your ornaments on a baking sheet and bake at 200°F for 5–8 hours. It’s a slow process, but it ensures your ornaments dry completely and stay crack-free—perfect for keepsakes that last for years.
Seal & Hang
Once cooled, brush with Mod Podge to seal, or get creative and paint them in your favorite colors first. Thread a ribbon through the hole, and your handcrafted ornament is ready to hang on your tree—or give as a heartfelt gift
Tips:
- Add a little sparkle: Brush a bit of glitter on the ornament before sealing for a festive touch.
- Try metallics: Gold or silver paint makes simple shapes feel extra special.
- Store carefully: Keep your ornaments in a cool, dry place to prevent cracking over the years.
- Personalize with names & dates: Use a toothpick or skewer to write your child’s name and the year—these make every ornament a keepsake.
- Get creative with shapes: Don’t just stick to classic circles—heart, star, or tree shapes, or even DIY shapes made with a cup or vase — make fun, unique ornaments.
Other Blog Post You May Enjoy:
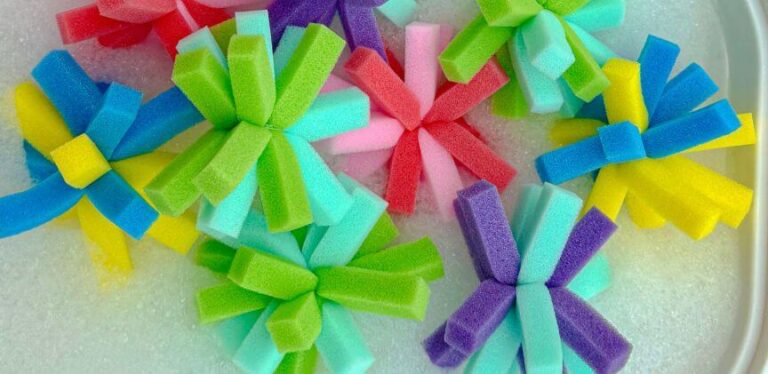
- Pom Pom and Water Sensory Play: A Simple, Fun Activity for Toddlers
- Taste-Safe Play Sand for Toddlers (Easy DIY Sensory Bin Idea)
Salt Dough Ornaments
Ingredients
- 2 cups flour
- 1 cup salt
- 2 tbsp cream of tartar
- 1 tbsp oil
- 1½ cups water add slowly
- Mod Podge and/orpaint
- Ribbon for hanging
Instructions
- Mix Dough: Combine flour, salt, and cream of tartar in a bowl. Add oil and slowly mix in water until dough is soft and pliable.
- Roll & Shape: Roll out dough on a lightly floured surface. Press in handprints or footprints, or use cookie cutters, cups, or a vase to cut shapes.
- Make a Hole: Use a straw or skewer to create a hole for ribbon before baking.
- Bake: Place on a baking sheet and bake at 200°F for 5–8 hours until fully dry.
- Seal & Hang: Once cooled, paint or brush with Mod Podge. Thread a ribbon through the hole and hang on your tree!
Salt dough ornaments aren’t just decorations—they’re memories you can hold onto year after year. Whether you hang them on your tree, gift them to loved ones, or save them in a keepsake box, these DIY handprint Christmas ornaments will be a tradition your family cherishes forever.