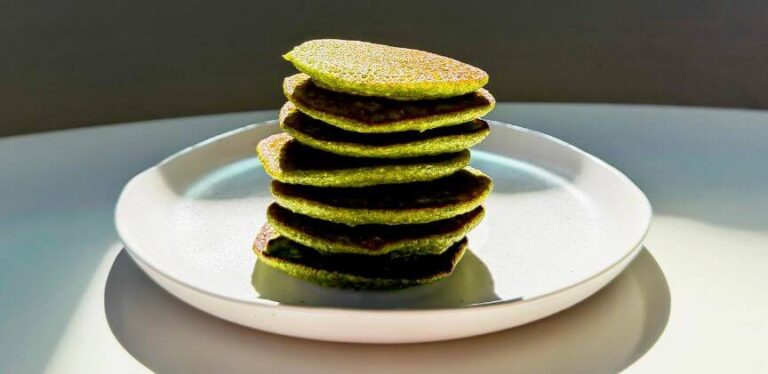


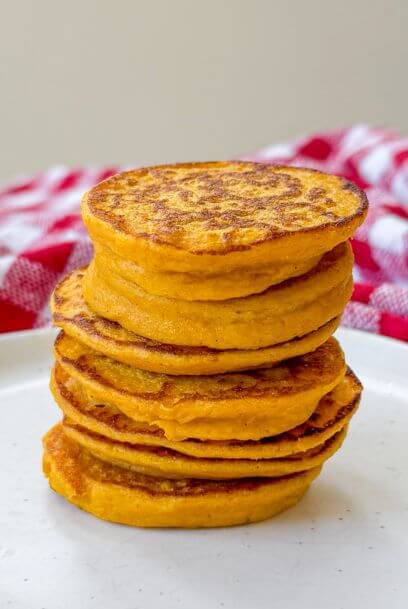
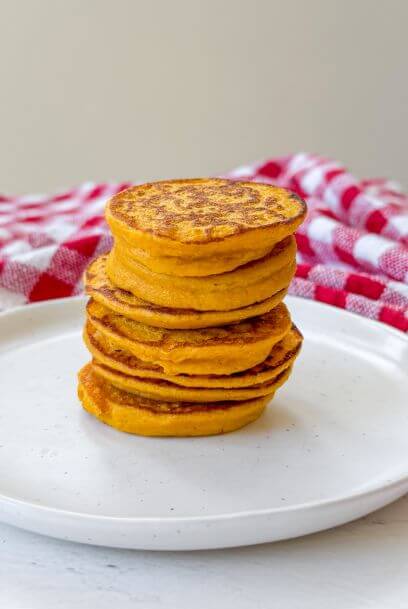
If you are looking for a mess-free, nutrient-dense breakfast that your toddler will actually devour, these blender pumpkin pancakes are about to be your new morning best friend.
These healthy toddler pumpkin pancakes are one of my favorite breakfasts to make on repeat. They’re made in the blender, come together quickly, and are soft, fluffy, and easy for toddlers to eat. Naturally sweetened with pumpkin and lightly spiced, they feel cozy without being heavy. I love making a batch at the start of the week or freezing extras so breakfast is already done when mornings feel rushed.
You will love Healthy Toddler Pumpkin Pancakes because:
- Made in the blender for quick prep and minimal cleanup
- Soft, fluffy texture that’s easy for toddlers to chew
- Naturally sweetened with pumpkin, no added sugar
- Easy to batch prep for the week or freezer
- Perfect for breakfast, snacks, or on-the-go meals
Healthy Toddler Pumpkin Pancakes are made with:
- Old-fashioned rolled oats: Blended into a soft flour that adds fiber and keeps little bellies full longer.
- Full-fat Greek yogurt: Adds protein and healthy fats while keeping the pancakes tender and moist.
- Pumpkin puree: Naturally sweet, full of fiber, and gives these pancakes their cozy flavor.
- Egg: Helps bind everything together and adds extra protein.
- Vanilla extract: Enhances the natural sweetness and adds warmth.
- Cinnamon: A gentle spice toddlers love that pairs perfectly with pumpkin.
- Pumpkin pie spice: Adds cozy fall flavor, or you can use a pinch of ginger and nutmeg instead.
- Baking powder/Baking Soda: Helps the pancakes rise and stay fluffy.
- Salt: Balances the flavors and brings everything together.
- Milk of choice: I used carton coconut milk added slowly to reach the perfect pancake batter consistency.
How to make Healthy Toddler Pumpkin Pancakes:
- Load the Blender: Add the liquid ingredients (milk, egg, pumpkin, yogurt, vanilla) to your blender first, then top with the oats, baking powder, salt, and spices. This prevents the dry ingredients from getting stuck at the bottom.
- Blend Until Smooth: Secure the lid and blend on high for about 30–60 seconds until the batter is completely smooth and the oats have turned into a fine flour consistency.
- The 2-Minute Rest: Let the batter sit in the blender for 2 minutes. This is the secret step! It allows the oats to hydrate and the baking powder to activate, ensuring your pancakes are fluffy rather than flat.
- Heat the Surface: Preheat a non-stick skillet or griddle over medium-low heat. Lightly grease with a tiny bit of butter or coconut oil.
- Pour and Cook: Pour small circles of batter onto the skillet. Small pancakes are much easier for toddlers to handle and easier for you to flip!
- The Flip: Cook for about 2–3 minutes. Once you see small bubbles form on the surface and the edges look set/matte, flip carefully.
- Finish and Cool: Cook for another 1–2 minutes on the second side. Transfer to a wire rack or plate to cool slightly before serving to your little one.
Substitutions:
- Dairy-Free: You can easily swap the Greek yogurt for a thick coconut yogurt and use any dairy-free milk.
- Spices: If you don’t have pumpkin pie spice, a simple mix of cinnamon and a tiny dash of nutmeg or ginger works perfectly or you can leave out and just use the cinnamon.
- Sweetness Boost: If you prefer a sweeter pancake, you can add a tablespoon of maple syrup directly into the blender batter.
Recipe Tips:
- The Scoop Secret: Using a cookie dough scoop isn’t just for cookies! It’s my favorite way to get evenly sized pancakes that cook at the exact same rate.
- Don’t Rush the Heat: Because of the yogurt and pumpkin, these cook best at a medium-low temperature. This ensures the middle sets perfectly without the outside getting too dark.
- The “Pour Test”: If the batter feels too thick after sitting, add milk one tablespoon at a time and pulse. You want it thick but pourable.
Taste and Texture::
These pancakes are soft, fluffy, and lightly spiced with a gentle pumpkin flavor. They’re tender enough for toddlers while still feeling filling and satisfying.
Serve and Store:
To Serve: We love serving these with yogurt, nut butter, fresh fruit, or chia jam.
To Store: Store leftovers in an airtight container in the fridge for up to 4 days.
To Freeze: Flash-freeze them in a single layer on a baking sheet for an hour before transferring to a freezer bag. This prevents them from sticking together! Just pop them in the toaster or microwave for a quick breakfast.
Other Recipes You May Enjoy:
- Pink Beet Protein Pancakes (baby/toddler friendly)
- Spinach Banana Blender Muffins (Healthy Toddler Recipe)
- Healthy Toddler Pumpkin Oatmeal Bars (No Added Sugar)
Healthy Toddler Pumpkin Pancakes: Easy Blender Recipe
Ingredients
- 1 c rolled oats
- 1/2 c full-fat Greek yogurt
- 1/2 c pumpkin puree unsweetened
- 1 egg
- 1/2 tsp Vanilla extract
- 1/2 tsp cinnamon
- 1/2 tsp pumpkin pie spice or a pinch of ginger and nutmeg
- 1 tsp baking powder
- 1/4 tsp baking soda
- 1/8 tsp salt
- 3/4-1 cup milk of choice add slowly to reach desired consistency ( you may need more or less)
Instructions
- Add Ingredients to Blender: Add the liquid ingredients (milk, egg, pumpkin, yogurt, vanilla) to your blender first, then top with the oats, baking powder, salt, and spices. This prevents the dry ingredients from getting stuck at the bottom.
- Blend Until Smooth: Secure the lid and blend on high for about 30–60 seconds until the batter is completely smooth and the oats have turned into a fine flour consistency.
- The 2-Minute Rest: Let the batter sit in the blender for 2 minutes. This is the secret step! It allows the oats to hydrate and the baking powder to activate, ensuring your pancakes are fluffy rather than flat.
- Heat the Surface: Preheat a non-stick skillet or griddle over medium-low heat. Lightly grease with a tiny bit of butter or coconut oil.
- Pour and Cook: Pour small circles of batter onto the skillet. Small pancakes are much easier for toddlers to handle and easier for you to flip!
- The Flip: Cook for about 2–3 minutes. Once you see small bubbles form on the surface and the edges look set/matte, flip carefully.
- Finish and Cool: Cook for another 1–2 minutes on the second side. Transfer to a wire rack or plate to cool slightly before serving to your little one.